A plaster ceiling is composed of lime/gypsum, sand, water, and some kind of fiber. When plaster cures, it turns into a hard, durable concrete-like substance, making cutting a hole in a plaster ceiling impossible. When the ceiling is damaged by a roof leak, an accident, or furniture shifting, holes are frequently necessary.
Cutting a hole in a plaster ceiling is usually a simple task; but, if your plaster ceiling is part of an older structure, extra caution is required. The same is true in cases where the plaster ceiling has been damaged to the point that the structure’s stability has been jeopardized. In such circumstances, cut a hole using the instructions below:
Step 1: Precautions for Safety
Sagging and cracks in your plaster ceiling indicate that it needs to be fixed. Wear thick leather gloves before beginning the operation of cutting a hole in the plaster ceiling so that the metal does not irritate your skin.
Before doing any work, turn off the house’s main power switch. It’s also a good idea to use safety glasses and a dust mask to avoid inhaling plaster dust, which can harm your lungs and skin. A hard plumbing hat should also be worn to protect against injury if any loose plaster pieces fall down.
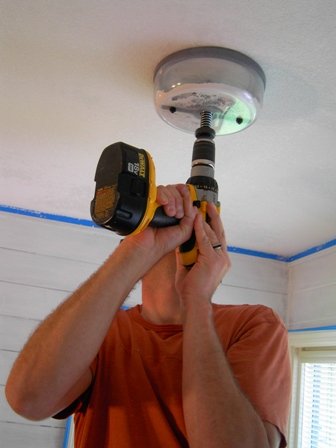
Step 2: Drilling
Drill holes through the damaged region with the largest drill bit available. The process will be easier if the drill is more powerful, since it will demand less manual effort on your part. The holes should be spaced an inch apart.
Drill straight lines to frame the chosen region after the holes have been drilled. Before you drill, make sure there are no plumbing pipes or cables in the way. After drilling, use a hole saw to cut the first hole, followed by another hole saw for the second and subsequent holes.
Step 3: Cutting
Place a piece of plywood against the ceiling as a guide after drilling the first hole. Screw the plywood to the joists to keep it in place. As you prepare to cut, make sure the saw blade is as thick as the plaster and lath combined. You’ll be able to cut the plaster without damaging the joists this way.
Cutting with a circular saw fitted with a mason
ry carbide blade. Cut through the plywood and the plaster at the same time. This will save the ceiling from being damaged and will keep the plaster from breaking apart as you cut.
Table of Contents
Tips for Building Box Ceiling Beams
Box ceiling beams are a terrific idea for a variety of areas. It tends to give the room a warm and “homey” atmosphere, as well as tying the entire design together. If you want to build box beams, here are some pointers to get you started.
Take accurate measurements
Make sure you take accurate measurements of the space so you know how many beams you’ll need. The standard size of a box beam is 4′′x8′, so measuring the space can help you figure out how many you’ll need.
Painting Before Installing
Many people make the mistake of attempting to paint or stain the beams after they have been placed. It’s a lot easier to accomplish this now, while the beams are still on the ground and easily accessible. You’ll have a much tougher time putting them up once they’re up, and you’ll most likely wind up with a lower-quality product.
Start with the sides
Another crucial point to remember is to nail in the sides first, then work on the bottom, so you have access while you work. This makes the process considerably more efficient.
Corner Modeling Guidelines
While corner molding can give a charming aesthetic touch to a room, there are times when it needs to be removed, such as when renovating or doing maintenance. To correctly remove your molding, follow these procedures.
Prepare
Begin by gathering all of the tools you’ll need for the job. Check to see how the molding was originally applied, as this will assist you decide which tools to use. A drop cloth is nearly always a good idea to catch the little particles that will chip off as the molding is removed.
Loose Fastener
Before you can remove the corner molding, you’ll need to loosen it. Place the ladder securely so that you can reach the molding without having to stretch.
Use the utility knife’s blade to go along the joint where the molding meets the wall. To cut through the caulk that was used to install the molding in the first place, this is required. Remove the molding by running it along the upper and lower edges.
Create Space
The space created by the previous procedures can be used as a starting point for totally removing the corner molding. Starting at one end of the upper edge, place the chisel’s tip against the join and hammer the end into the gap. Repeat this method down the length of the molding at regular intervals.
Once that’s done, repeat the technique around the bottom border of the molding. Be careful not to drive the chisel too far into the wood.
Remove Modeling
Finally, place the chisel in the gap at one end of the molding to remove it. To avoid gouging out any pieces of the wall or ceiling, place the putty knife between the wall and the chisel before pulling it away. When probing downward rather than upward, this is easier to do.
Using a smooth rolling motion, gently draw the chisel and putty knife away from the surface. If nails were used to hold the molding in place, they will fall out during the procedure.
Frequently Asked Questions
1. Can you drill into the plaster ceiling?
When hanging goods on plaster, it’s nearly always necessary to drill a hole first, because nails may not penetrate the thick surface and, if they do, they tend to leave fractures. Drilling a hole in plaster carefully eliminates cracking and reduces the amount of plaster dust stirred up.
2. Can you screw directly into plaster?
Screws are your best bet for hanging objects on plaster walls that don’t have picture rail. Screwing lighter things into the plaster with a 1 1/4″ drywall screw will suffice. Screws with masonry anchors can be used for heavy goods.
3. Do wall anchors work in plaster?
Lath and plaster walls are not compatible with plastic wall anchors. Instead, use metal plaster anchors like molly bolts or toggle bolts. Make sure to go under the plaster and lath with one that is long enough. A masonry bit is required when drilling into plaster.
4. Can you drill into the ceiling?
Set up the drill press overhead. Place the drill in the press and lift it until the bit is almost at the ceiling’s level. To prevent movement during drilling, position the overhead press to line up the drill bit with your mark and then lock the wheels in place. Raise the drill until the bit is flush with the ceiling.
5. Do ceiling hooks need anchors?
If you need to hang your ceiling hook where there isn’t a joist, use a toggle bolt with a hook, often known as a toggle “anchor.” A toggle anchor with a hook has a bolt threaded through the center of two spring-loaded wings, and instead of a typical bolt head, a hook is affixed to the end of the bolt.
6. What are the disadvantages of plastering?
Because the joint compound that seals the seams between the boards needs to dry before another coat is applied, finishing the drywall to a smooth surface takes several days. Except for a small amount released when water is first added to the powder, plaster does not produce any dust.